Appendix A
Command Line Basics
When taking the CompTIA Security+ exam, CompTIA expects you to know command-line basics. Many people in IT know the command line because they work with it regularly. However, it can be challenging for others. This appendix is for you if you’re new to the command line.
Windows Command Line
Before you can use the command line in Windows, you first need to launch the Windows Command Prompt window. The simplest way to do so is to click the Start button, type in Command, and select Command Prompt. The Start button is at the lower left of your screen.
In some situations, you need to start the Command Prompt window with elevated permissions as an administrator. To do this, click the Start button, type in Command, right-click on Command Prompt, and select Run as administrator.
If you’re using a different version of Windows, you can find directions online. Use your favorite search engine and enter “command prompt” to find it.
Linux Terminal
The terminal is where you run commands in a Linux system. There are different ways to access the terminal, depending on the Linux distribution you’re using. If you’re running Kali Linux (recommended while using this book), you can start it by simply clicking the terminal icon on the Kali menu.
Many test takers find learning Linux commands challenging because they don’t have a Linux system. You might have trouble with even the easiest questions if you can’t enter them and see what they do. However, it’s easy to create a bootable USB (or buy one) and use any PC as a Linux box. The online labs include a lab you can use to create a bootable USB.
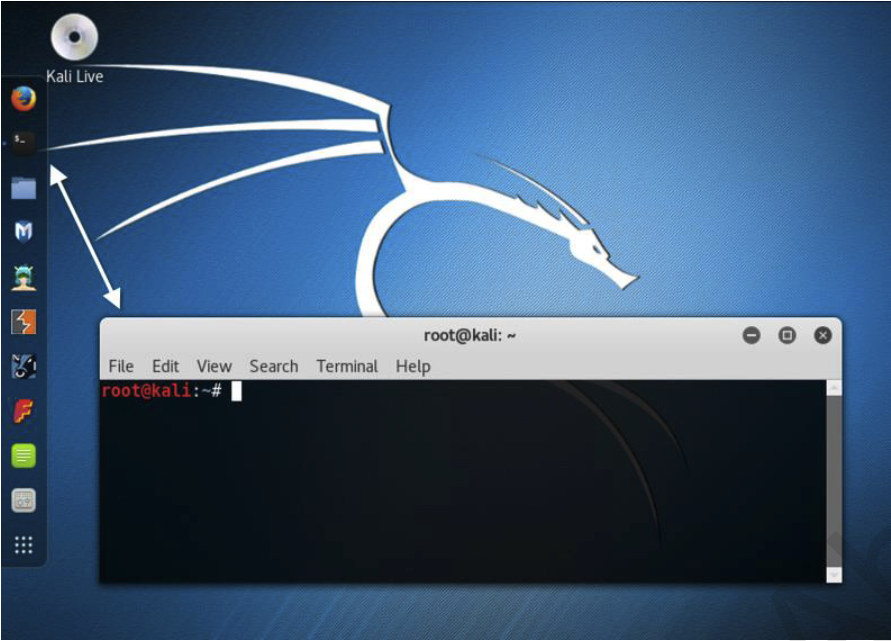
Figure Appx A.1: Launching the terminal in Kali Linux
For simplicity, instead of stating “Linux or Unix” throughout this book, I’m just stating it as Linux. Note that Linux is a popular version of Unix, and most commands that run in a Unix terminal will also run in a Linux terminal.
Understanding Switches and Getting Help
Almost every command you’ll run across has options available that you can invoke with a switch. A Windows command-line switch uses a forward slash (/) or a dash (-) after the command and includes an option that modifies the command to perform a different function.
Linux commands use switches too, but they typically only use a dash. If you use a forward slash, you will typically get unexpected results or an error.
The most used switch in Windows systems is the help switch identified with a question mark. For example, you can use the help switch to get help using these commands:
ping /? or ping -?
ipconfig /? or ipconfig -?
netstat /? or netstat -?
Although Linux terminal commands also use switches, they don’t use the question mark for help. The common way to get help on a command is to query the online system reference manual using the man command. For example, the following commands retrieve help on the relevant commands:
man ping
man ifconfig
man netstat
Some commands have extensive feedback available when you use incorrect syntax. As an example, ping doesn’t recognize the -? switch on Linux systems. Instead of just giving you a message of “incorrect syntax,” it provides details on usage. This looks like help, but it is different than the information in the man page.
Understanding Case
Most Windows commands are not case sensitive. In other words, you can type in commands using uppercase characters, lowercase characters, or any combination. For example, each of the following commands ping the localhost IPv6 address (::1) and provide the same output:
ping -6 localhost
PiNg -6 localHOST
PING -6 LocalHost
However, this is not true in the Linux terminal. Instead, commands are typically lowercase, and if you use uppercase letters, you’ll find that the command is not recognized. Of the three commands shown for the Windows command line, only ping -6 localhost works within the Linux terminal.
As you go through these commands, note that many of them support both IPv4 addresses and IPv6 addresses. By querying help, you can see how to do each.
Understanding Linux Permissions
Linux permissions may look odd the first time you see them, but they represent three simple concepts—read, write, and execute:
Read (R) indicates someone can open the file and view its contents
Write (W) indicates a user can modify the contents. You’ll see read combined
with write most, if not all of the time.
Executes (X) indicates a user can launch the file. It is assigned to files that can be
executed.
Additionally, permissions apply to three identities:
The first set of permissions applies to the owner of the file.
The second set of permissions applies to the owner’s primary group (by default).
Any user can be a member of multiple groups, but a user will have only one
primary group. The default owner group can be changed if desired.
The third set of permissions applies to everyone else.
You can see a list of files in a folder along with their permissions by using the ls -l command at the terminal. The following shows an abbreviated output from the ls -l command:
-rwx rw- r-- user usergroup size/date/time myfile.txt
drwx r-- --- user usergroup size/date/time mydirectory
The first line shows the permissions assigned to a file named myfile.txt, and the second
line shows the permissions assigned to a directory named mydirectory. Note that the first
character is a dash (-) or a d and indicates the entry refers to a file using a dash (-) or a
directory, using a d. The three group permissions for the file are:
rwx indicating read, write, and execute permissions for the owner
rw- indicating read and write permissions for the owner group
r-- indicating read permission only for everyone else
Note that when a permission isn’t assigned, you’ll see a dash instead.
Converting Linux Permissions to Numbers
You’ll often see permissions represented as octal numbers (from 0 to 7). As an example, consider the myfile.txt mentioned earlier. Instead of representing the permissions as rwx rw-r- -, it would be 7 6 4.
It’s worthwhile to refresh your knowledge of octal numbers, which is a base-8 numbering system. Three binary bits represent each octal number, as shown in the following list:
Octal 0 = Binary 0 0 0
Octal 1 = Binary 0 0 1
Octal 2 = Binary 0 1 0
Octal 3 = Binary 0 1 1
Octal 4 = Binary 1 0 0
Octal 5 = Binary 1 0 1
Octal 6 = Binary 1 1 0
Octal 7 = Binary 1 1 1
Additionally, each group of binary bits represents specific permissions:
The first bit is used for read (r).
The second bit is used for write (w).
The third bit is used for execute (x).
If the bit is a 1, it indicates that a permission is granted. If the bit is a 0, it indicates that a permission is not granted. The following list shows the commonly used octal numbers and their related permissions:
Octal 0 = Binary 0 0 0 No permissions (- - - )
Octal 4 = Binary 1 0 0 Read (r - -)
Octal 5 = Binary 1 0 1 Read and Execute (r - x)
Octal 6 = Binary 1 1 0 Read and Write (r w -)
Octal 7 = Binary 1 1 1 Read, Write, and Execute (r w x)
The following list shows octal numbers that are not normally used:
Octal 1 = 0 0 1 Binary Execute (not used because Execute also needs read)
Octal 2 = 0 1 0 Binary Write (rarely used because Write would typically include read)
Octal 3 = Binary 0 1 1 Write and Execute (not used because Execute also needs read)